Monday, July 29, 2013

Half-Square Triangles Tutorial: Eight at a Time

A few months ago, I wrote a tutorial on making half-square triangles two at a time.  That technique works great if you only need a dozen or so.  However, I had plans to make a baby quilt entirely out of half-square triangles, and I wanted to make them more efficiently.  I discovered a way to make eight at a time, which worked great for a project where I needed so many.

The quilt is all assembled, and I'm so excited, it looks awesome!  I just basted it, and it's next in line for hand-quilting after my great-grandma's bow-tie blocks quilt.  Now, I have to share how I made all these half-square triangles without losing my mind.
1.  First, from both fabrics cut squares double the size you want your half-square triangles. (I'm using white and blue fabrics here.)

I wanted my squares to be 3" in the quilt, so I needed them to be 3.5" before assembling.  I like to make my half-square triangles half an inch larger than I need them so that I can square them up first, so I made them 4" square.  For 4" half-square triangles, I cut 8" squares from both of my fabrics. 


2.  Next, mark sewing and cutting lines.  I usually mark the lighter fabric so it's easier to see.  

On the wrong side, mark the middle of the square both horizontally and vertically.  Then draw diagonal lines from corner to corner.  Pin your two fabrics right sides together. 

3.  Sew  1/4" away on both sides of both diagonal lines.  You should have 4 stitching lines.

(oops, I forgot to take a pic before cutting, but you can see my stitching here)


 4.  Cut on all four marked lines.  You should now have 8 triangles with stitching on the long side.

 5.  Open up your triangles and press the seam toward the darker fabric.  

6.  Use a rotary cutter to trim all the squares to the correct size.  This is easiest with a small square ruler that has a 45 degree angle marked.

Line up the 45 degree angle along the triangle edge.  It's important to line up the angle so the points of your triangles match when piecing them together. 

Trim a little from all four sides to square it up.  Here, I'm trimming to 3.5".  As you can see in the picture, you won't be trimming off very much and you might be tempted to skip this step.  Don't skip it, or your patchwork will be all wonky and very frustrating.

One half-square triangle ready for piecing!
Even making these eight-at-a-time is quite a bit of work.  But, they make beautiful patchwork!  I can't wait to get to work on the quilting.

-Lily


Monday, July 22, 2013

Cloth Baby Wipes Tutorial

We've been using cloth wipes for several years now, and we love them.  No chemicals, they don't dry out skin, and they're super cheap.  Sometimes I think we save just as much on wipes as we save on diapers, especially when I had a breastfeeding baby.  

Since we were already using cloth diapers, using cloth wipes is actually easier than disposables.  We have the whole diaper system set up anyway.  I just have a spray bottle of water at my changing table, and I moisten the wipes I need at each diaper change.  
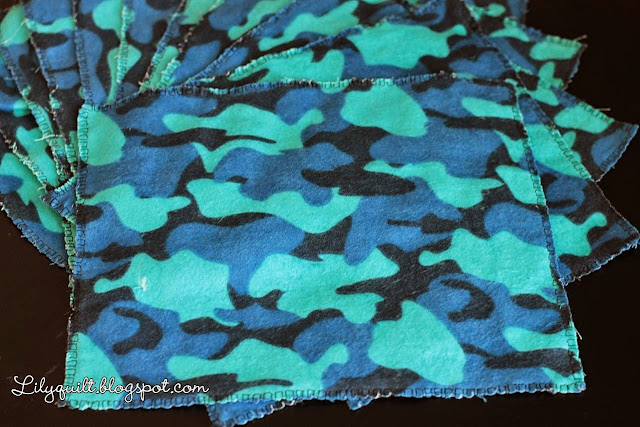
We have a whole bunch of wipes already, but some of them are getting pretty worn from constant use.  Plus, we have a newborn on the way, who will go through plenty of wipes, so when my mother-in-law gave me some flannel scraps, I knew the perfect project!  

Maybe I shouldn't get this excited over poop rags, but these were free, which I love.  And, they're so easy to make, I whipped out this whole batch in no time.  I hate all my unfinished projects sitting around, so it felt good to finish something.

Let's get sewing:
1.  Cut your flannel into 9 x 8 inch rectangles.  Don't worry about making it perfect, they are just wipes.

They look a little big, but flannel will shrink, and you do not want too-small baby wipes.

2.  If you have a serger, you can just serge the edges.  If you have a regular sewing machine like me, choose an overlock stitch.  You can see I used stitch "M" on my machine, which shows a little pic of this kind of stitch.

3.  Sew around the edges of all the wipes.  Your needle should be just off the edge of the fabric on the right-hand side.  Overlap the stitches where you start and end, and backstitch.
Done!  It's not the prettiest sewing I've ever done, but hey, they're for my baby's bum, so good enough :)

-Lily

Monday, July 15, 2013

Lazy Mom's Way to Make Greek Yogurt

I've really been on a yogurt kick this month.  First, I posted how to make homemade yogurt in a crockpot, then about my frugal yogurt starter.  Now, I've discovered a lazy way to make Greek-style yogurt.  

Let me start by saying that I've known an easy way to make homemade Greek yogurt for awhile.  But, it does involve dirtying a few dishes and a cheesecloth.  I'm getting lazy now that I'm pregnant with my 3rd, and even that seems like too much work.  

Last week I scooped my yogurt out of the container all on one side, leaving a mountain and a valley.  When I came back the next day to get more yogurt, presto!  The valley was full of whey, leaving Greek-style yogurt behind.  All I had to do was pour off the whey.  (If you're worried about all your yogurt falling out into the sink, you could also draw off the liquid with a turkey baster.)
It's not quite as thick and creamy as real Greek yogurt, but for zero work and time commitment, it's pretty good!

-Lily

Saturday, July 6, 2013

Frugal Homemade Yogurt Starter

My family loves yogurt, but I just couldn't fit it in our budget to buy yogurt every week.  Especially since the good stuff, without tons of sugar and other junk, is really expensive.  Then I started making homemade yogurt in a crockpot, and it's delicious and cheap!  Now we can enjoy yogurt every week--we love it topped with fruit, in our smoothies, or made into homemade frozen yogurt.

When I first started, I just bought a container of plain yogurt at the store and saved a little to use as my starter.  Then I saved several tablespoons of my homemade yogurt to use as a starter for the next batch.  However, after about 3-4 batches, the saved starter wouldn't work as well.  Then I'd have to go back to the store and buy more yogurt.

Next, I bought some Yogourmet freeze-dried yogurt starter packets.  The upside is that they make tasty yogurt, and it only takes 4-5 hours (versus 8-10 hours for store-bought yogurt as the starter).  The downside is that they were expensive--about five dollars for six packets.  I didn't want to have to keep buying expensive starter, that defeated the whole point of making my own yogurt.  So, I devised this plan to make dozens of batches from that one box.

First, I made a batch of yogurt with a Yogourmet packet, following the packet directions.  When it was finished, I saved some in the fridge to use as the starter for the next week.  I also filled an ice cube tray with yogurt.  Each cube held about 2 tablespoons of yogurt.  I froze the tray, then popped the cubes out and stored them in a Ziploc.
For the next several weeks, for my starter I used the yogurt I'd saved in the fridge from the previous batch.  But, after several batches my saved starter didn't work as effectively.  Then I pulled out several frozen cubes.  I put them in a little glass bowl and let them thaw at room temperature.   

 Do not microwave the cubes, you will kill the bacteria and your yogurt won't culture! Also, yogurt that has been frozen and thawed looks really weird and watery for some reason.  Don't panic, just use it like regular starter.
After the yogurt was ready,  I saved some in the fridge to use as a starter for the next week. For the next several weeks, for my starter I used the yogurt I'd saved in the fridge from the previous batch.  When it started to lose effectiveness, I pulled out more cubes from the freezer. 

Having frozen yogurt cubes was also convenient when we went out of town on vacation this summer.  Before we left, we just ate up all our yogurt.  When we came home, I just pulled several starter cubes from the freezer to make yogurt.

As you can see, this method will allow me to make several months of yogurt from just one freeze-dried packet.  So far, I've had the starter cubes in the freezer for about 2 months and they still work great.  The freeze-dried packets should last over a year since I store them in the fridge.  I'm hoping to make about a year's worth of yogurt from that one $5 box!  Sometimes being frugal is so fun :)

-Lily

Wednesday, July 3, 2013

Homemade Yogurt in a Crockpot

My family loves yogurt, but the good stuff is really expensive.  I tried once several years ago to make my own, but without success.  (Picture chunky milk rather than creamy yogurt...it wasn't pretty).  Then I found this awesome tutorial on Keeper of the Home for making yogurt in a crockpot.  I've been making weekly it for months now, and it works great! (You can also check out my frugal yogurt starter tutorial)

Since it's well-written, I follow the tutorial closely and only had to make one modification.  I make my yogurt in a glass container rather than directly in the crockpot.  This simplifies the process:  when the yogurt is done culturing I can just put the glass dish in the fridge, rather than clearing a whole shelf for my huge crockpot.  Plus, I don't have to clean yogurt off my crockpot.

I was worried that the heat from the crockpot wouldn't transfer well enough if I just set the glass dish inside.  So, I add about 1 inch of water and the glass dish to my crockpot when I turn it on, and I let them heat up with the crockpot.  Make sure you don't stick a cold glass container into hot water, or you can crack the glass.
When you add the yogurt starter to the milk, add the starter to the milk before pouring it in the pyrex.  Otherwise, the milk sloshes everywhere if you try to stir in the starter in such a small bowl.  Then I loosely cover the glass dish with its lid, so that the condensation from the crockpot lid doesn't drip into the yogurt as it cultures.

Now you can make your own super-easy homemade yogurt in a crockpot!  And if you like your yogurt super thick and creamy, check out my super-easy tutorial for making homemade greek yogurt.

-Lily