Thursday, November 29, 2012

Tutorial: Spider-Man Pajamas from a T-Shirt (Part 1)

Ever since I started sewing, my pack-rat tendencies have gotten a little out of hand.  I have stacks and stacks of old clothes that I can't bear to give away--it's free fabric after all, and maybe I could use it one day (I know, big maybe...)  

I found a tutorial at It's Always Autumn on making little man pj's from a t-shirt, and I knew I had to make some cute jammies for my little man.  Just making grey pants and a black shirt seemed awfully plain.  I added a grey spider to the shirt, and suddenly, they're awesome Spider-Man pajamas! 
My adorable model, I think he's singing "Itsy Bitsy Spider"
This is part 1, where I'll cover how I made the raglan shirt.  Check out part 2 for the pants tutorial.
What you need:
  •  XL men's shirt (plenty of material for size 2T pj's)
  •  pair of pajamas to use as pattern pieces
  • matching thread
  • ball-point needle for sewing knits
 Let's get sewing:
1.  Lay out your pattern piece at the center of the t-shirt, lining up the bottom hems and folding in your sleeves.  Cut about 1/2 inch away from the edge (to allow for seam allowances).  If you want to make set-in sleeves, check out the original tutorial.

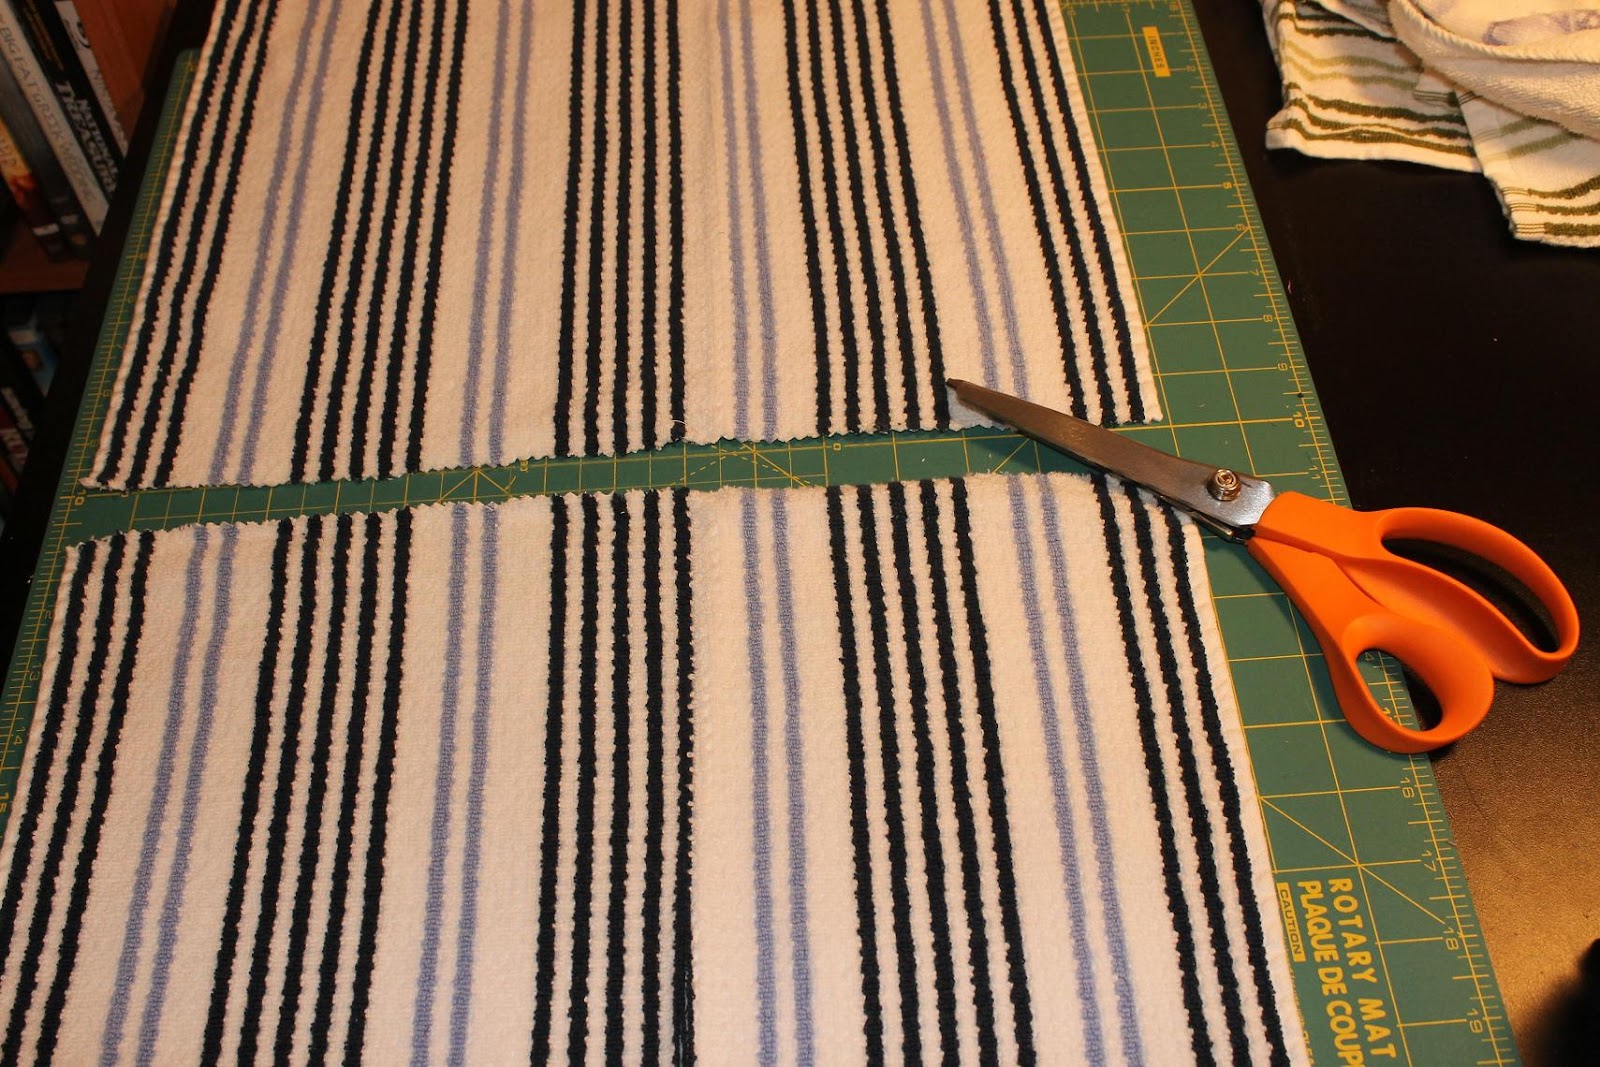
2.  Cut sleeves from the sides of the shirt.  Again, use the existing hem at the bottom of the t-shirt and add 1/2" on all sides for seam allowances. 

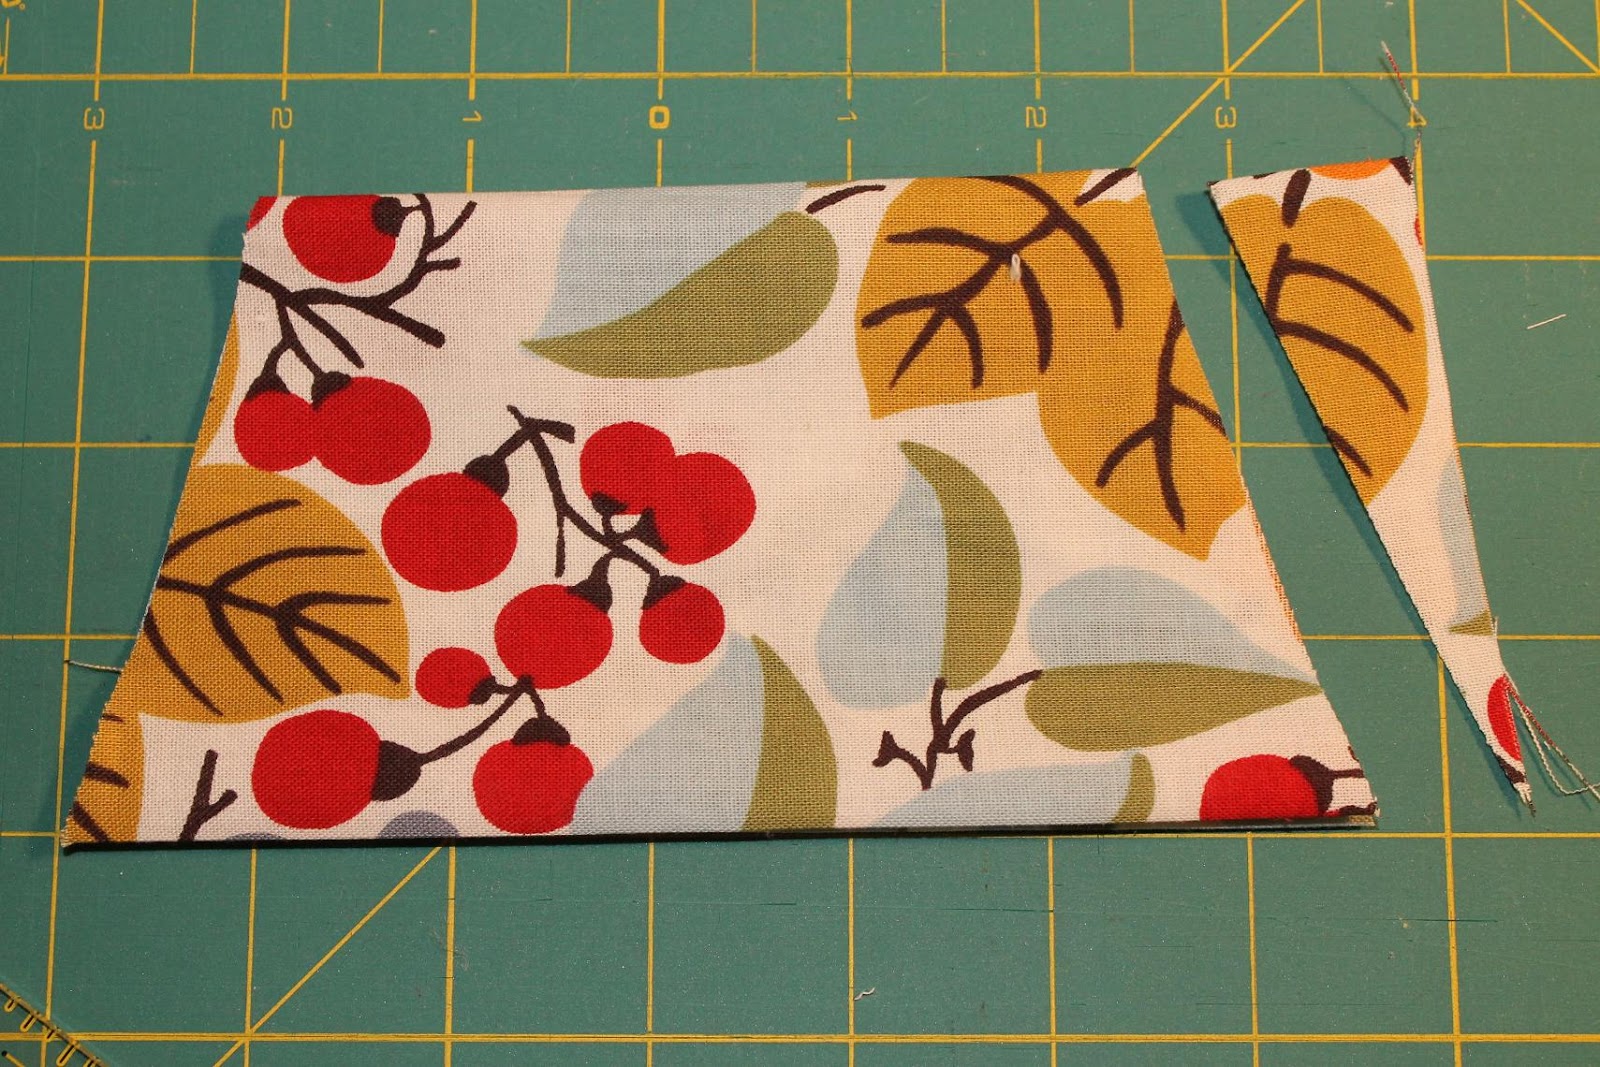
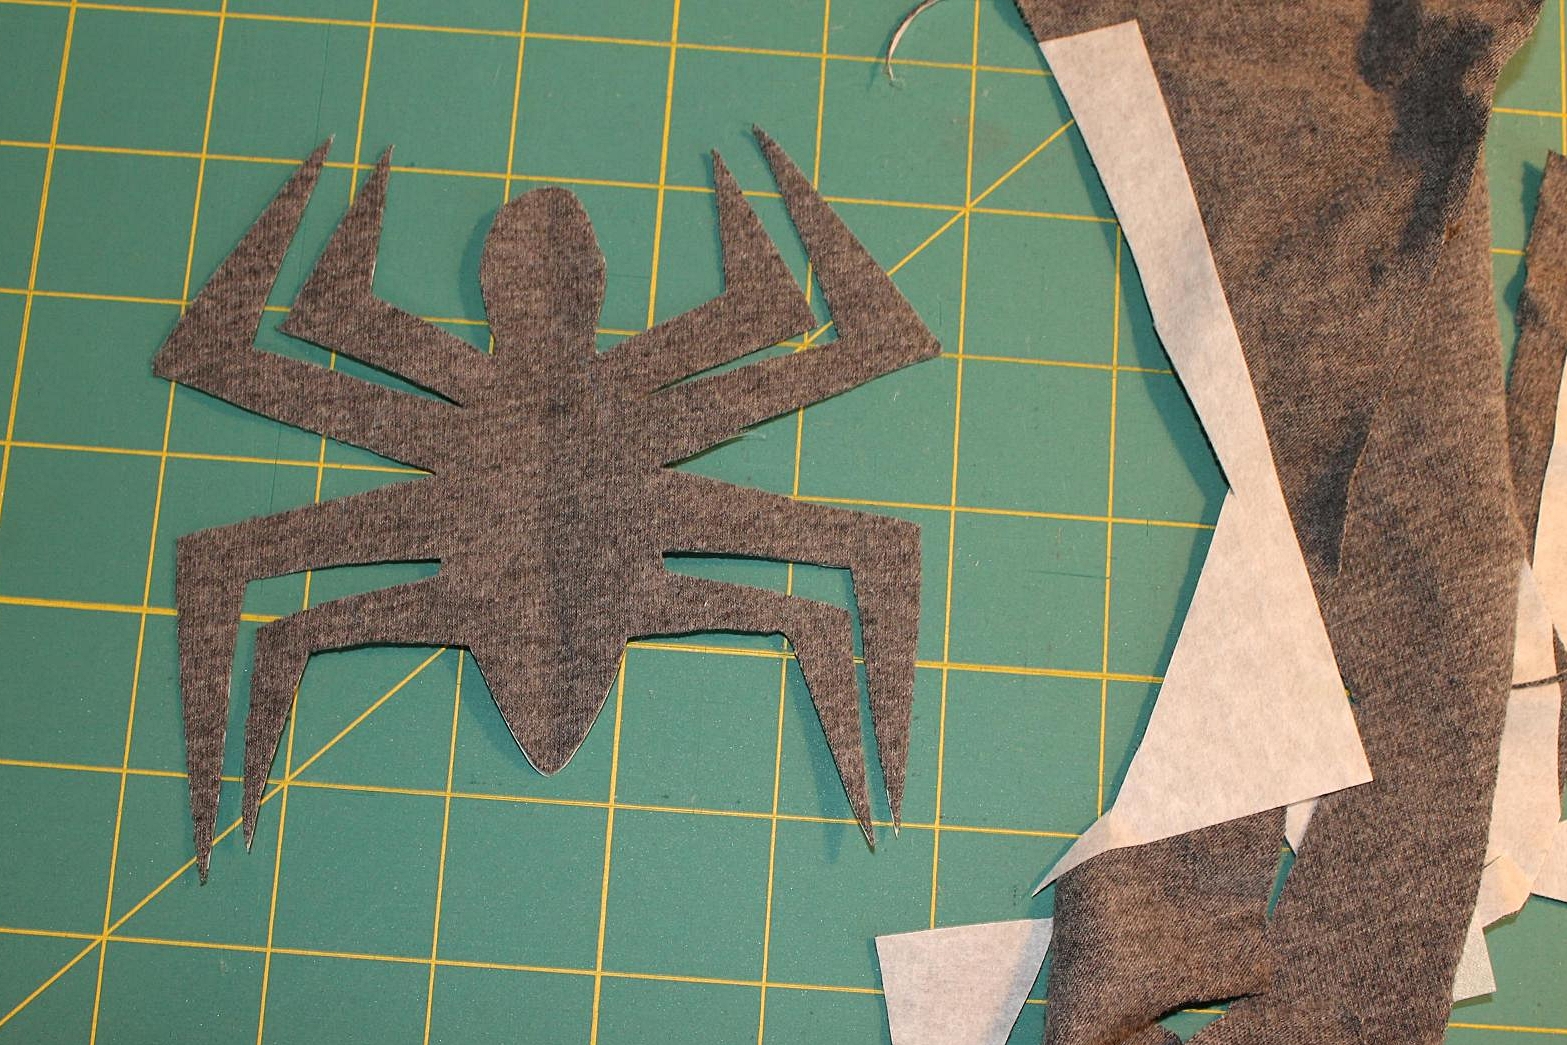
3.  Cut out a spider (I did this free-hand, but I'm sure you could find a Spider-Man printable for a template.)  I used extra material from the sleeve of my t-shirt.  **But, you might want to wait until after you cut out your pants to cut out the applique, since you'll be using the sleeves to make the pant legs.

 I used fusible web to attach the spider to the front of the shirt.  Then I sewed around with a straight stitch about 1/8" from the edge to securely attach it, leaving the edges raw.

4. Place shirt pieces right sides together and sew the two sides, up to the bottom of the diagonal.  Since I don't have a serger, I had to decide whether to use a straight stitch or a zig-zag stitch.  I ended up sewing 1/2" from the edge with a straight stitch, then 1/4" from the edge with a zig-zag because I've read about popped seams when working with knits.

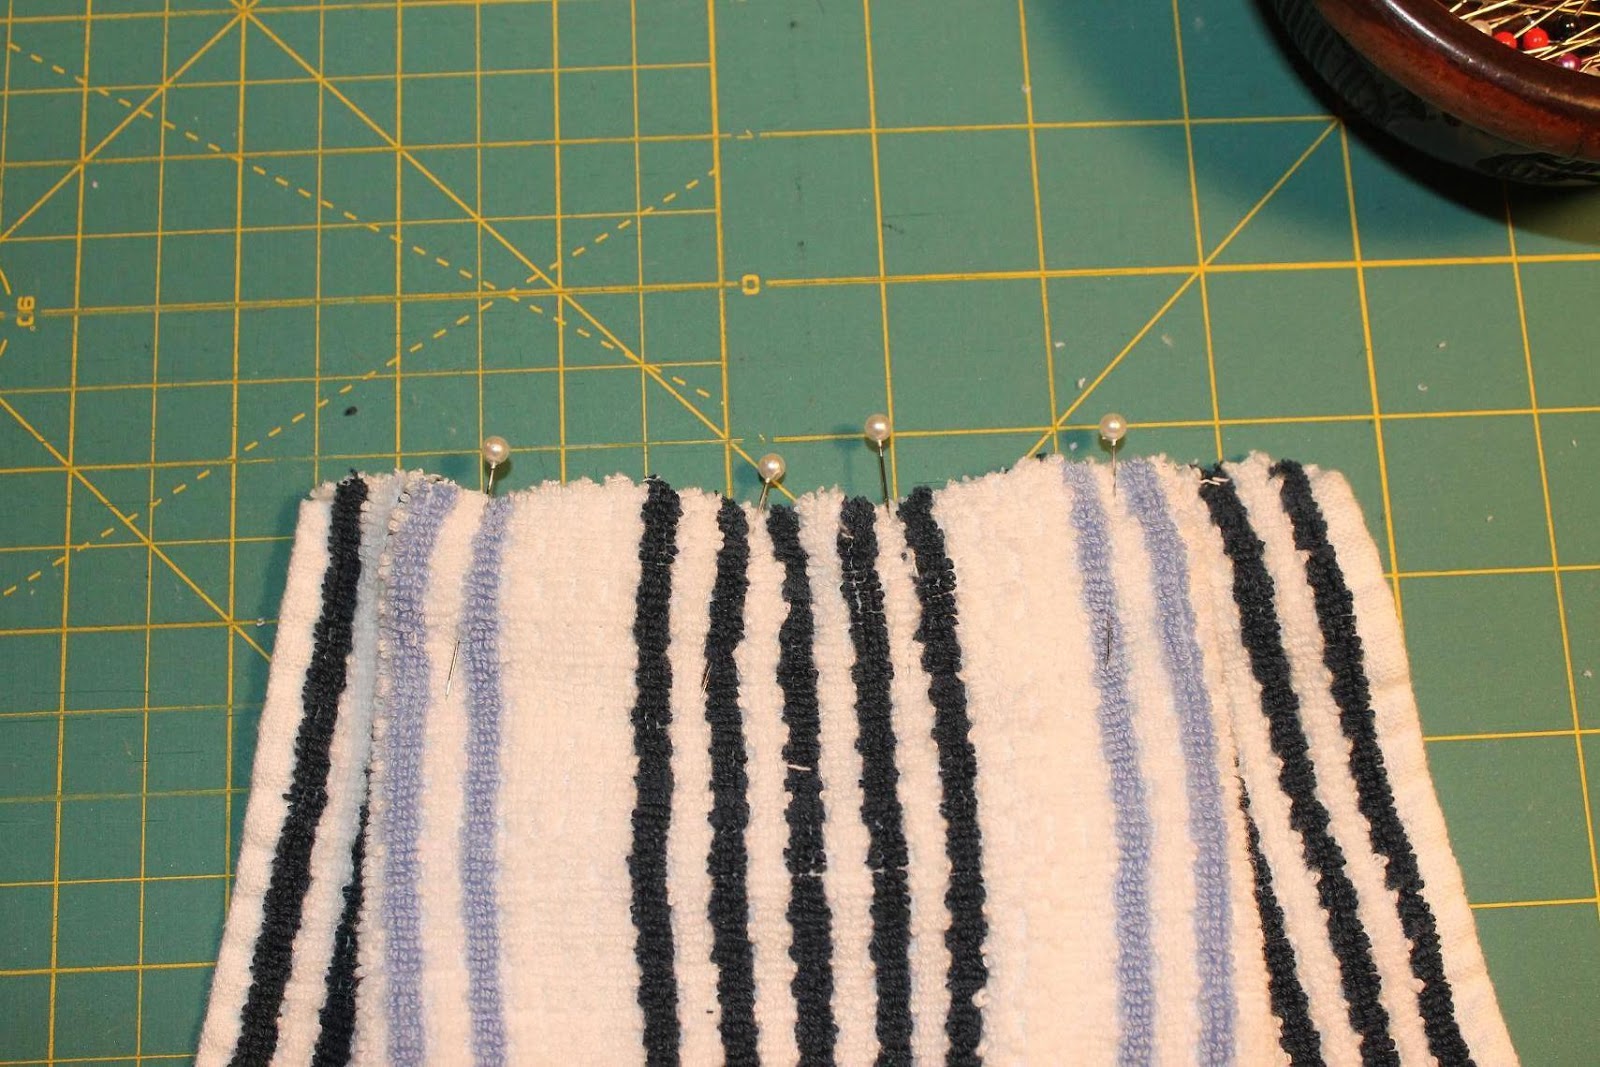
5.  Place sleeve pieces right sides together and sew along both sides, leaving the diagonal open.

6.  Turn the sleeves right-side out.  Place one inside the shirt, with right sides together.  Line up the seam at the bottom.  Starting at the back neck point, sew along one side of the diagonal, across the seam, then along the other side of the diagonal.

Repeat for the 2nd sleeve.

7.  Turn the shirt right-side out.  Cut the collar off your XL t-shirt.  Measure the collar of your pattern pj's and add about 1", then cut your collar piece.  Tuck in one end 1/4" and tuck the other end inside.  You should now have a circular collar with no raw edges.

Center the collar join in the back.  Pin the collar around the top of the shirt, aligning the raw edges.  Sew together with a zig-zag stitch.

Fold down the collar, then sew 1/8" under the collar with a straight stitch.  Make sure to stretch as you sew so the stitching won't be too tight to stretch over a toddler's head.

And that's it, you've finished the top and are ready to move on to making the pants! 
-Lily

Linked up at some of the great blogs on my sidebar

Monday, November 19, 2012

Advent Calendar Tutorial

Sometimes, projects can sit around waaaay too long.  For example, I started this advent calendar last November...and I just finished it.  But, it's the end result that matters, right?  And it did turn out really cute, so I'm glad I didn't try to rush it.  Don't be alarmed, it's a pretty simple project.  About 98% of the time I took to finish it was spent procrastinating.  
Now all I have to do is make a felt marker to move from pocket to pocket.  Hopefully that doesn't take me until next Christmas!  (Update: Check out the tutorial for the felt star and baby Jesus markers I made)

What you need:
  • 1 main fabric, 24 x 22 inches
  • 1 backing fabric, 24 x 22 inches
  • 1 piece of batting, 24 x 22 inches
  • 4 pieces of fabric 8 x 8 inches, for the tabs.  I don't recommend a directional fabric, or you might have upside-down trees like me, oops.
  • 5 pieces of white fabric, 9 x 20 inches, for the pockets
  • Red felt
  • White and green embroidery floss
Let's get sewing:  I used all-purpose white thread and a 1/2" seam allowance.

1.  First, make the pockets.  I decided it was a lot easier to make 5 long pockets and divide them with quilting lines, rather than sew on 25 separate pockets.  Fold your rectangles in half, right sides together, so that you have 4.5 x 20" rectangles.  Sew around the 3 open edges, leaving a 3" opening for turning.  Clip your corners (see pic) so they'll lay flat when turned out.
Turn out the pockets, press, and topstitch 1/8" and 1/4" away from the folded edge.

2.  Next, make the tabs.  Fold the squares in half, right sides together.  Sew along the open long side of the rectangle formed.  Turn out and press. 

3.  Place your backing and main fabrics right sides together, and place the batting on top.  Pin the the tabs along a short end.  Place between the main and backing fabrics, aligning the raw edges.  Place the two outer tabs 1" from the edge and leave about 2.5" between tabs.

Sew around all four edges, leaving a 5" opening in the bottom for turning.  Turn out, then topstitch 1/4" and 1/2" away from the edge.

Your calendar should now look like this:

4.  Cut out 40 1.5 x 2.5" rectangles from red felt, then cut out all the numbers by hand.  (I started with rectangles because it helped me keep the numbers a consistent size.)

5.  Lightly mark the pockets about every 3 3/4"--that's where the dividing lines for the pockets will be.  Use these lines to help center your numbers.

I couldn't decide whether to use white or green thread, a running or blanket stitch, so I used all of them to attach my numbers.  You can use your preferred hand stitch, or even attach the numbers by machine.  I used 2 strands of embroidery floss.

6.  Now attach your pockets to the calendar.  Note that in my pic, I don't have the numbers attached.  I added them after sewing the pockets to the calendar, which I think was a bad idea.  It was really hard to get my needle in and out behind the pocket without sewing through the main fabric.  If I did this again, I would attach the numbers first, then attach the pockets second.

Pin your pockets on the calendar and topstitch along three edges to attach, leaving the top of each pocket open. 

7.  Using your marks as a guide, topstitch about every 3 3/4" to form pockets.  I did this with hand-quilting, but you could also use a machine.
Have fun counting down and preparing for Christmas!
-Lily

Linked up at some of the great blogs on my sidebar

Wednesday, November 14, 2012

Homemade Ham and Bean Soup

Mmmm, soups really are my family's favorite food all winter.  I love how they are cheap, easy, and oh-so-delicious. 

We often buy spiral-sliced hams (we actually just bought two, they're on sale right now for Thanksgiving).  But after you eat all the slices, you're left with a bone and a bunch of scraps.  That's where this great recipe comes in.  You save the bone and scraps, and toss them in a stockpot.  Add some beans and veggies = super cheap and delicious dinner.
This soup takes about 4 hours total, but it's simmering for most of that time and you don't have to do anything.  I usually start this after lunch, and when dinnertime comes supper is ready and waiting!
What you need: for about 10 servings
  • 1 lb Great Northern Beans, soaked overnight or quick-soaked
  • 1 spiral sliced ham bone and scraps  (the assorted pieces that aren't neatly sliced)
  • 8 cups water
  • 1/2 tsp garlic powder
  • 1 1/2 tsp Italian seasoning
  • 1/2 tsp ground black pepper
  • 2 medium onions, chopped
  • 3 carrots, chopped
Let's get cooking:
1. If you haven't soaked your beans, quick-soak them according to the package directions.
2. Meanwhile, in a large stockpot bring 8 cups water and your ham bone and pieces to a boil.  Reduce heat and simmer for 1-2 hours.
3. Remove ham bone and fat from the broth.  Save any pieces of ham from the bone, then discard.  Cut any large chunks of ham into smaller pieces, then add back to the stockpot.
4.  Drain beans and add to the soup.  Add spices.  Bring to a boil, then reduce heat and simmer about 1 hour.
5.  Add onions and carrots and simmer about 1 hour.

And that's it, five steps and your soup is ready :)
-Lily
Linked up at some of the great blogs on my sidebar!

Monday, November 12, 2012

Simple Pillow Cover Tutorial

 When I started sewing, I wanted to make some custom pillow covers for our couch.  But, I was so intimidated by the buttons, snaps, zippers, and piping that pillow patterns always have. Then I discovered how simple pillow covers can be.  You can add all the cute extras if you want, but if you're a novice sewer like I was, you just want a simple, square pillow cover.

What I discovered was an envelope pillow cover.  The front is just a square, and the back is two flaps of fabric, so you can slide your pillow form in and out.  This style is great because it's cute, simple, and it can be removed and washed in case of a baby goo emergency.
What you need:  for a 16" pillow cover:
  • 16.5" square of fabric for the front
  • 2 pieces of backing fabric, 16.5" x 14" and 16.5" x 26"

  Let's get sewing:

1.  If you're using a simple square of fabric for the pillow front, skip this step.

I pieced and quilted a log cabin block instead of using a plain piece of fabric for my pillow front.  I made a 17" log cabin square, basted it with batting and white fabric, then I quilted a square spiral and trimmed it to 16.5" square.

 2.  Now, attach the back flaps to the pillow front.  I did some patchwork on one of the back flaps, but you can also solid pieces of fabric.

Press both pieces in half, right sides out.  You should now have two pieces, 16.5" x 7" and 16.5" x 13".

3.  Pin the 13" piece to the right side of the pillow front, aligning the raw edges.  If you did patchwork for the backing, make sure that your favorite part is facing the pillow front.

Pin the 7" piece to the other side of the pillow front, aligning the raw edges.  The back flaps should overlap about 3".

Detail of the back flaps overlapping.

 4.  Sew around the square with a 1/4" seam allowance.  If you'll be washing your pillow cover a lot, I'd use a triple stitch so it's more secure.  Backstitch at the beginning and end.

Flip it right-side-out, and you're done!
-Lily
Linked at some of the great blogs in my sidebar!

Thursday, November 8, 2012

Homemade Brown Sugar

Who knew you could make brown sugar at home??

It's always exciting when I learn how to make something homemade.  And last week, I found the book The Homemade Pantry by Alana Chernila at the library.  There are a ton of great recipes to explore, and I'm sure I'll try several more.  The first one that caught my eye was homemade brown sugar.  It's never even crossed my mind that I could make it at home.  Apparently, it only takes two ingredients and takes about a minute.

Why have I been paying twice as much for brown sugar than for white sugar??  No more!  I have crossed another processed item off my grocery list :)

What you need:
  • 1 cup white sugar
  • 2 tsp unsulphured molasses
 (yes, that's really all you need)

Pour the molasses over the sugar. 

Fluff with a fork until it is all mixed in.  At first it looks like you've ruined your sugar, and it's all clumpy.

Don't worry.  Keep going, and in a minute you'll have brown sugar.
I've been using this for months in my recipes, and it tastes and acts the same as store-bought brown sugar.

-Lily

Linked up at some of the great blogs on my sidebar!

Monday, November 5, 2012

Hanging Kitchen Towels Tutorial

I love hanging towels in my kitchen, they look so much nicer than just shoving a towel through the stove handle.  Plus, my one-year-old thinks it's a really fun game to pull the towels off, and then Mommy puts them back up, then he pulls them down...all day.

I've seen a couple different versions of hanging hand towels recently--some with buttons, crochet loops, and other options, but I wanted to make some that could tie on and make a cute little bow.
These are cute, practical, and simple to make, so they would make perfect Christmas presents.  I made these for me, but I'll probably be making a few more sets as we head into the holidays.

What you need: for 2 hanging towels
  • 1 kitchen towel
  • 2 pieces of main fabric, 6.5 x 9"
  • 2 pieces of batting, 6 x 8"
  • For the ties, 4 pieces of bias tape, 18" each (or cut 1.5 x 18" strips and see straight-grain "bias tape" tutorial)
Let's get sewing:
1. Cut your towel in half so you have 2 pieces, 13 x 16" each.

2.  On the raw edge, make a large pleat in the center of the towel, so that the top of the towel measures 6" across.  Lay the pleat flat and pin.  Baste 1/8" from the edge to secure the pleat.

3.  On main fabric piece, press under short edges 1/2".  Fold in half, short ends together.  On the fold, mark 1" in from both sides.  Cut from the mark to the bottom edge.  Repeat on the other side.  You should have a trapezoid.

4.  Cut your batting the same way you cut your fabric in step 3.  Open your trapezoids and center the batting on the wrong side.

5.  Fold the batting and trapezoid over the pleated towel edge.  Sew 1/4" from the edge.  I used a triple-stitch to make it secure, since the towel hangs on this seam.  Make sure to catch the front and back of your fabric.

6. Quilt the fabric panel.  Here's a close-up of a finished towel so you can see one of the quilting patterns I did.  One set has concentric trapezoids, and the other has parallel lines about 1/2" apart.

 7.  Open your bias tape (or straight-grain tape, like I used.)  Press both short ends in 1/2".  Lay the open tape on the back of the main fabric.  Align the pressed short end with the top of the towel and align the raw edge to the main panel raw edge.  Baste the raw edges together 1/4" from edge.

8.  Now, fold the tape over  to the front of the main fabric.  Pin the tape in place.  Sew 1/8" from the edge, attaching the tape along the fabric edge, then continue along the tape to form the tie.

 You should now have a towel that looks like this!  Repeat steps 2-8 to make your 2nd towel.


-Lily

Link party some of the great blogs on my sidebar.


Friday, November 2, 2012

Chicken Soup from Scratch


It's getting colder, which means it's time for soups and stews!  I love making soup for dinner--I get it all prepped during the kids' naptime.  Then it can simmer on the stove until we're ready for dinner, and we don't have that crazy hour before dinner when I'm trying to cook, and E wants my attention, and the baby is crying,and my poor husband walks in the door into chaos.

I like to make chicken soup from scratch, which means that the first three steps you're basically making your own chicken stock.  Then you strain out the bones and make the soup.
When I buy chicken breasts, I get them with ribs attached.  I cut off the breast off for other meals and save the chicken bones/scraps in a ziploc in the freezer.  When the bag is full, I make chicken soup!

The total time for this recipe is about 4 hours--but don't worry, most of the time your soup is simmering and you don't have to do anything.

What you need:  for 10 servings
  • 3 lb chicken bones (one large ziploc full of bones)
  • 2 carrots, cut up
  • 1 large onion, sliced
  • 1 tsp dried basil
  • 1/2 tsp garlic powder
  • 1/2 tsp whole black peppercorns 
  • 2 bay leaves
  • 8 cups cold water
  •  1 sweet potato, cut into 1 inch chunks
  • 1 1/2 cup medium noodles
  • 1 cup frozen green beans
  • 2 tsp salt

Let's get cooking:

1.  Combine first 8 ingredients (through water) in a stockpot.  Cover and bring to a boil, then reduce heat.  Simmer, covered, for 2-3 hours. 

2.  Place a double layer of cheesecloth in a colander, and place over a large bowl.  Pour the stock through the colander to strain.  Place broth back in the stockpot.

3.  Let everything in the colander cool a little so you can handle it.  Separate out the veggies, chicken bones, and chicken pieces.  Discard the bones.  Place the veggies and chicken pieces (I had about 8 oz) back in the stockpot.


4.  Add the sweet potato to the soup.  Simmer 1 hour, then increase heat and bring to a boil.  Add the noodles and green beans.  Boil until noodles are cooked.

Enjoy! 
-Lily